27/01/2013

From the Back of Beyond

I've already posted this on the LAF but I'm putting it here for completeness.

It's a small Chinese walled compound or farm utilising the two Chinese buildings that are currently available from my catalogue (there will be more at some point soon). It could be used in any Chinese action and I'll probably do one for myself for the Boxer Rebellion.

The walls were scratch built but they are along the same lines as some wall masters that I have on the workbench. The buildings were painted in an off tan colour (Foundry American Tan I think) for the walls and a grey for the roof and then given a wash with a wash I've made up from matte medium, flow improver, some water and a couple of dashes of Vallejo inks (green, brown and a bit of black). Drybrushing was with Foundry Canvas light.

Typical groundwork and growies all round with part of a lager model tree stuck in the back to help give it it more of a setting. The figures are from my Boxer Rebellion Japanese range.

ttfn


23/01/2013

Some Japanese commissions

Not much to say on these as the vast majority of the techniques used have been mentioned before in previous posts so I'll just post some pictures and leave you to it :-)

ttfn


15/01/2013

Something of a record...

For me anyway. Six posts in one month! Let's hope it keeps up.

Tonight's little jaunt is the beginnings of a project that myself and a couple of chaps are going to be doing this year... 40mm Napoleonics ! God knows how we started on the subject, but it got funnier and more enticing as we talked about it and by the end of the next day I had ordered ten of the Perry Spanish.

Now being the terrain maker of the group (and also a slight sucker for punishment) I will be doing what we need, which for once isn't a lot. We intend to play on a four by four max and only have three or four buildings plus the various little features that help to bring the game alive.

With it being a new project I got all excited and started (and very nearly finished) the first building. They will all be based on multiples of 150mm and I'm hoping to get a slight hillside with holes for the buildings to go in. The idea being that they can be swapped around for more playability but blend more into the surrounding terrain.

The building itself was a simple foamcore construction with the windows and doors cut out. The foam was indented a bit to give some three dimensionality to it and then coated in a mix of masonry paint and fine sand. The window frames and shutters were lasered spares that I had lying around and the shed was just balsa wood. The tiles were Wills pantile sheeting with some half round for the ridge line.

Painting was quite simple, base coat, wash and a heavy drybrush. Ground work was done in the normal way but with the addition of some of those grassy tufts things.

I'm quite pleased with the way it turned out and hope to get some more done in the coming weeks (along with the figures of course).

ttfn


14/01/2013

Old figure, new painting

Just a quickie tonight, got to be up early tomorrow.

There was a lucky dip competition on LAF a short while ago (on the internal boards) where everyone who took part took a figure from a mystery bag and had to paint it. The figures themselves were donated by the people taking part and it certainly was a mixed bag (pardon the pun).

I got quite a good figure as far as I was concerned. It's an old GW Necromunda tech of some sort with separate arms (you know, the ones from the old Imperial Guard plastic kit, the first iteration [cracking figures and I've got loads to paint]). I added a newer version of the bolter and made a very Necromuda styled base for him, the idea being that hopefully the base would wow enough to excuse the possibility of a naff paint job :-) I'm pleased to say though that I'm quite happy with the whole thing; base and figure.

Anyway, enough blabbering. On to the photos...

ttfn


12/01/2013

New Victoria

Can't sleep again so a good time for another post, this time explaining and showing a bit more of my Colonial Martian city of New Victoria.

I've been playing VSF on and off for the past few years with a mate across the river and occasionally with some chaps from the LAF and the story behind seems to be getting a little bit out of control. I'll write a full back story before Salute but basically, Mars has been colonised and some of the indigenous population aren't keen on the idea...

New Victoria is the largest human city on Mars and is ever expanding. The idea was initially thought up a while ago and just keeps getting bigger and bigger; city walls, railway, neff hangers and docking stations, reconditioned canals, the list just keeps getting added to.

Anyway, on to some photos of the railway as it stands at the moment. The idea for a railway was an early one but to put it on a viaduct was a late addition. I had already made some mesa as terrain pieces but. Thought it might be a good idea to have the railway at a higher level, starting on one mesa and going across the table possibly to another one at the other end (the table for Salute will be 6 x 12).

A quick look on google images set me off...

ttfn


10/01/2013

I can't sleep...

So I thought I'd make a small post using the pad again.

Only a couple of pictures this time of a member of the Kyoto Shinsengumi. They were basically a kind of police force in Edo period Japan (around 1860-65). You might have seen them in. Japanese historical drama but there were several other forces of this type, especially in the bigger town and cities.

I can't remember if I mentioned it before but I'm going to have an Edo period range of figures sculpted and the Shinsengumi will be part of this.

The figure itself is a Perry unarmoured samurai and there are a couple of other figures in the range that will suit and so I've made a start on them.

The second photo was played around with in a picture editing app whose name escapes me but it's a standard one and the options are nothing special (it was free though :-) but I thought it turned out rather well.

ttfn


06/01/2013

Something a little fantastical

As part of a larger commission I was asked to produce some elements of fantasy terrain leaning towards the orient, not too fantastical but just enough to make pele go 'Ooo, that's different'... Well, that's the idea anyway.

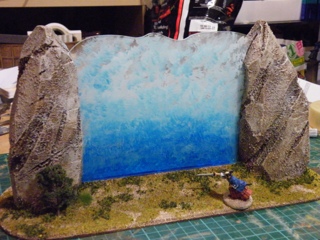
The first idea that popped into my head was a Gateway to Heaven, but something that's seen better days and could have been lost in the wilds somewhere. Keeping it simple was the order of the day and I though of two dolman and some steps leading up to nothing but having the ability of being able to place a portal in-between them.

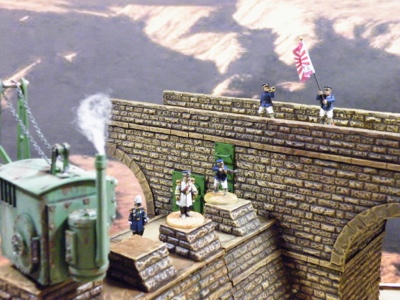
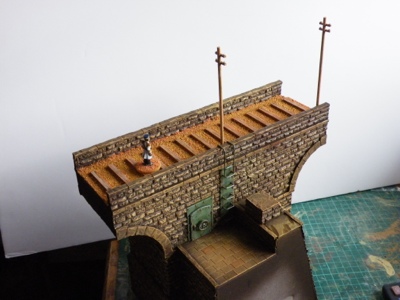
The photos show the progress in sequence and not in my usual format because I'm using 'Blogger' for the iPad, it means that I can post more posts without having to turn the desktop on (a struggle at the best of times) but at the moment it seems that the only choice for photos is to have them at the end, hopefully something that will be sorted soon.

On to construction. I started with a rounded base about 300mm x 130mm and two basic lumps of blue foam about 150mm high and 70 odd in diametre. These were carved into a pleasing dolman type shape and were distressed by dragging a small saw across at various angles creating cracks and fissures in the rock. When this was done they were coated first in a rough textured paint and then a finer one to bring the details together a bit.

The steps were carved from a material called foamex although I believe it's also known as foamed pvc. The carving of the stairs took some time as I wanted them to be random and weather worn, hopefully this has occurred.

The base itself was given a layer of filler to meet the stairs up the sides and at the back. A coat of Tamiya tan matt spray was sprayed over the whole model as a base coat. The rocks were inked and washed with various colours and drybrushed up to almost white.the stairs were just washed with a sepia ink and drybrushed the same as the rocks.

Then sand was applied to the base and treated in the normal way in which it's coated with a layer of dark brown ink and then brought up to quite a light earth colour with several drybrushes. Three different types of flock were added once this was all dry and some suitable plants and grass was also placed in various positions.

I did think of placing thick white rope around the dolman, similar to the type of rope you see around certain trees and rocks in Japan but I'll let my client decide that.

The final touch was the actual portal itself. Suffice to say I'm not 100% convinced by it but it does seem to work, after a fashion... I also highlighted the dolmen with a touch of blue/white to give the impression of a glow emanating from the portal. I might have another attempt and spray it at work to get a more subtle effect but again, I'll let the client decide.

On to the photos (the bit you've probably been waiting for ;-)