12/09/2015

Blockhouse!

Not many words for this one as time is short today but hopefully the pictures will paint a thousand words.

28mm, removable roofs and first floor, sold at Salute a few years ago. Very enjoyable to make :-)


ttfn

29/08/2015

A bit more Akira

Time has seemed to just rush by at the moment so apologies again for the recent spate of none posting.

To make up for it (I hope) below are some continuing shots of my slow burn Akira project.

Firstly some roof furniture. The signs were taken from the net and printed out at a size to fit the buildings but they can be swapable. The frames are laser cut and are fairly generic.


Next we have the elements for a typical expressway that fly all through the bigger cities (and some smaller ones). There's also a coupleof pictures of the base boards. They are only 300mm square, partly for ease of storage but also for maximum modularity.


And finally a couple of screen shots of the 3d model I'm making to help me plan it. I'm only showing it here to help visualise the expressway as at the moment it's go no paint on it and is a bit difficult to see.


ttfn

01/08/2015

A long time ago... Episode 4

Working my way through Incom's manufacturing catalogue at a steady pace now :-)

Next up is the T-47 'snowspeeder' from Bandai. This is a 1:48 scale kit and fits quite well with the bendy plastics from WotC. I must say that the Bandai kits go together like a dream and I only hope they do all the kits.

But of course, I couldn't just leave it at a normal kit, I felt a conversion coming on.

The first theatre for my Star Wars project is Tatooine (or it could be Jakku...) and so I thought a sandspeeder would be a good idea.

The first thing to do was to change the harpoon gun on the back (which I always though was a bit convenient...) to something with a little more kick.


Next thing was to cover the open area between the wing nodules to try ad stop the dust getting in. Just some styrene sheet with score lines on to match the existing panels. I also added a couple of grab rails and really shortened the cockpit to try and give it a more desert feel.


After these parts were finished, it was time for the paint. Quite a simple scheme of sand and grey (I'm still debating whether to put some identification markings on it). The whole thing wassprayed the sand colour apart from the cockpit, which was masked out as the detail for that was done already.


Once the primer coat was on a few areas were left unmasked for the grey to go on and then it was onto the weathering. GW inks and plenty of weathering powders did the trick along with some sponge paint chips in dark brown and silver.Also quite pleased with the way this turned out but the photos don't really do it justice :-(

The final element was the crew, fairly simple sculpts that only needed a simple paint job (I cheated and used decals for the helmets).


Here are the shots of the 'finished' thing so far. I might still put a few details on it but we'll see (the base is yet to finish).


Stay tuned :-)

ttfn

29/07/2015

A long time ago... Episode 3

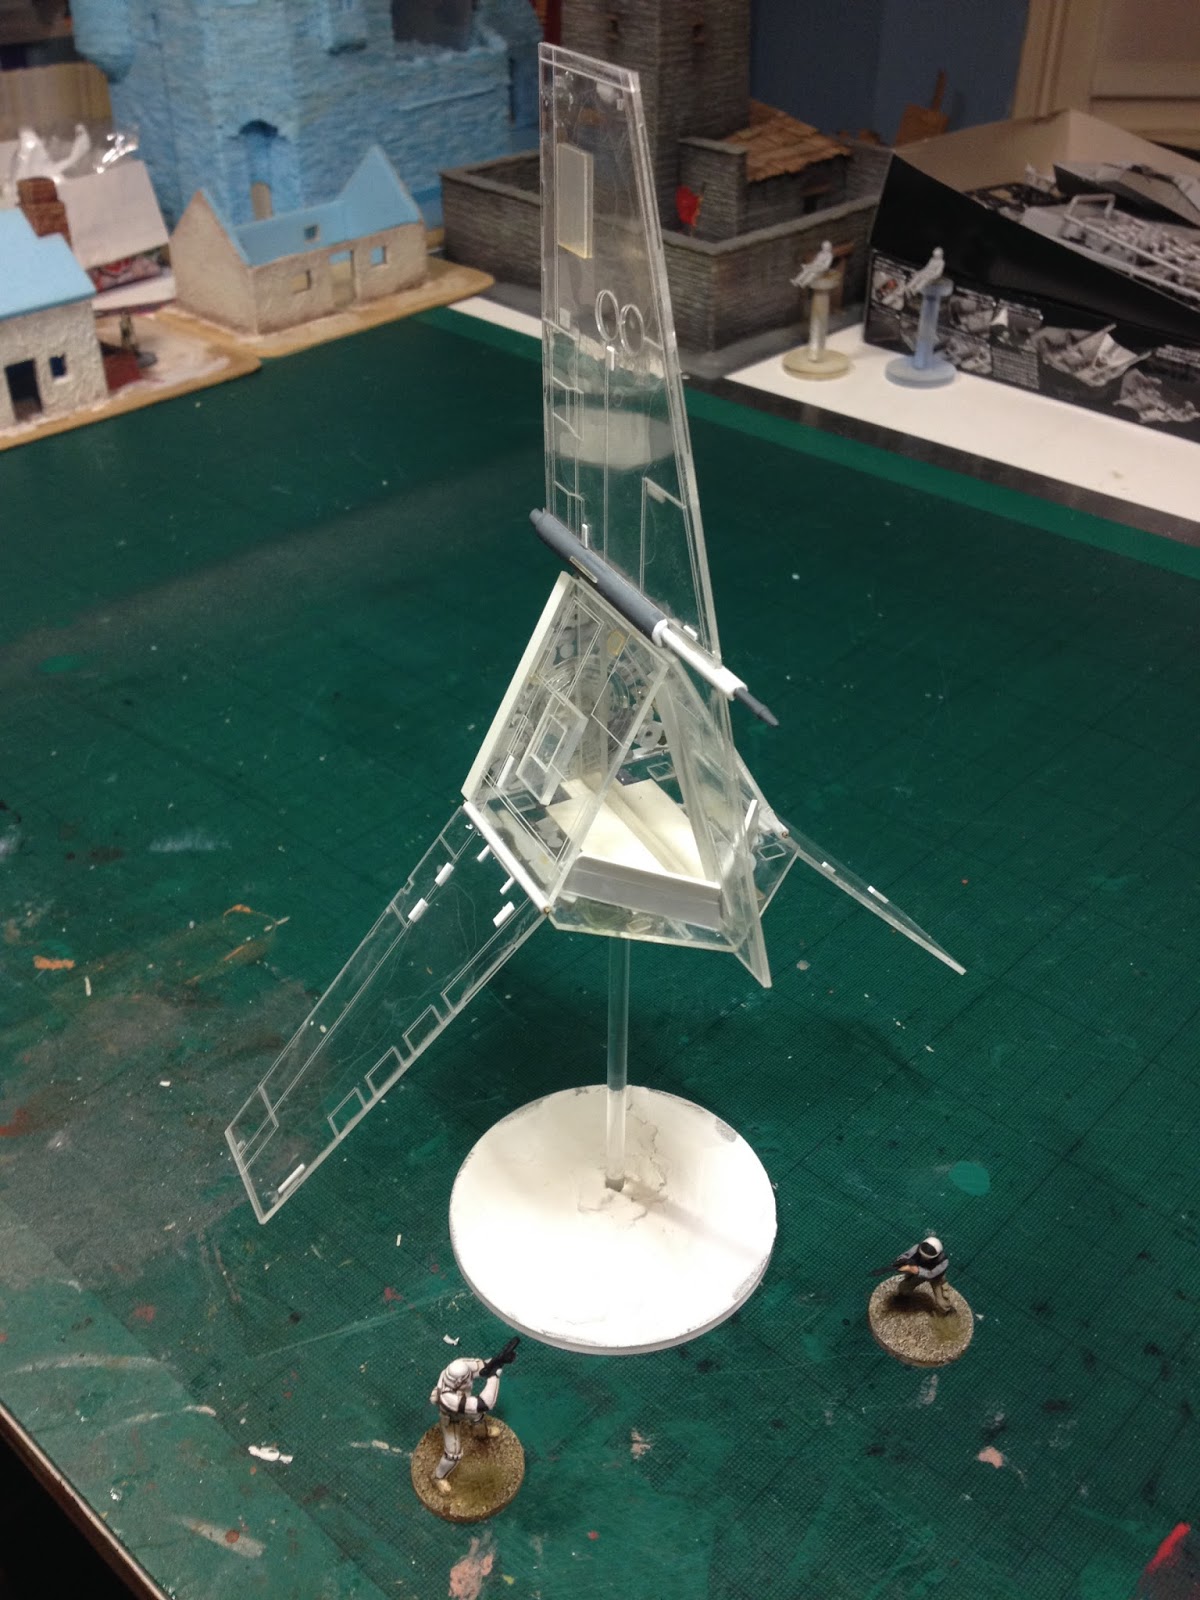
For this instalment I'll show the T-16 that I made. Just the one post for this as I'm quite pleased with it.

Schematics for it were taken from the net and put into Autocad where I drew a 2d digital model of it as most of the build is laser cut acrylic. The reason why I did it this way was to get even and consistent panel lines that I wouldn't get as good with just styrene.

The engine panel was just a selection of parts that seemed to fit the bill. The building itself isn't 100% accurate but the fluff for T-16's is that they are very common, used by the military etc and so a little difference here and there should be fine ;-)


Next up was the wings. I scoured the net for images of the bloody thing landed but to no avail (well, two, but they didn't show what I wanted) but I still went for them to be folded, partly as it's easier for storage and party because it's cool.


Just a simple bit of styrene tube with a brass rod through it achieved this. There are stoppers both top and bottom to stop the wings going too far, again, these are just styrene strips.


With the underneath complete the build was done and it was onto the fun bit, the painting!

A pale grey was sprayed over the whole model but with the windows already masked out. Once this was dry some markings were masked out and given a coat of mid green and again once this was dry it was on to the ink wash, rubbed off towards the rear whilst still wet gave an appreancce ofweathering streaks and with the addition of some weathering powders and rust inks the job was complete.


The yellow horse head is actually from an old GW tank kit but it seemed to fit the bill and the markings are that of Skinno Moskar, champion racer from Bestine and back out of retirement to defend his title.

I'll have to make some terrain boards soon, otherwise all this is for naught lol

Stay tuned :-)

ttfn

27/07/2015

A long time ago... Episode 2

As promised, here are couple of vehicles that will see their way onto the Tatooine table.

First off is a 'speedster' They seem to be into their racing on Tatooine (all that space I suppose) and I'm assuming that it's not just pod racing that happens there. I've got plenty of ideas for more and maybe even the beginnings of some basic rules...

A very simple build mainly utilising parts from a 1:700 ship kit and the snap fit 'Anikins starfighter' from Revell. There are lots of other tiny bits used from all over the place but it' mainly tank, plane and ship kits.


I went for a blue colour scheme for this one, no particular reason, just fancied it at the time.


 Next up is a freighter because what is Star Wars without it's battered workhorses :-)

The rear end is from before I went to uni (mid to late 90's) and it's stood the test of time for this long. Finishing it wasn't a problem though as I had the perfect part for the cockpit; an upside down 1:12 scale toilet bowl...

It's styrene sheeting for the most part with some added kit parts for the details.

After applying lots of little details a quick paint job of mainly white with a few coloured panels, applying some GW brown ink and some very heavy weathering we were done and I must say I'm quite pleased with how it turned out.


And here it is complete on the landing pad with Tag and Bink having a shoot out at each other (and missing).


Stay tuned :-)

ttfn